


You know the words and you can sing the song along with the record. Then the backing track starts on its own and the first entry arrives half a beat late, the chorus drifts flat, and the bridge you thought you knew turns out to have been carried by the singer on the record. Nothing unusual about that: singing along and singing alone are two different skills, and the gap between them is where most of the practice goes. The karaoke maker gives you the backing track, and its practice screen lets you close that gap one step at a time.
If you haven't learned the line yet, start with how to learn a vocal part from the recording, which covers looping and slowing down a phrase. This article picks up where that one ends.
Step 1: make the backing track
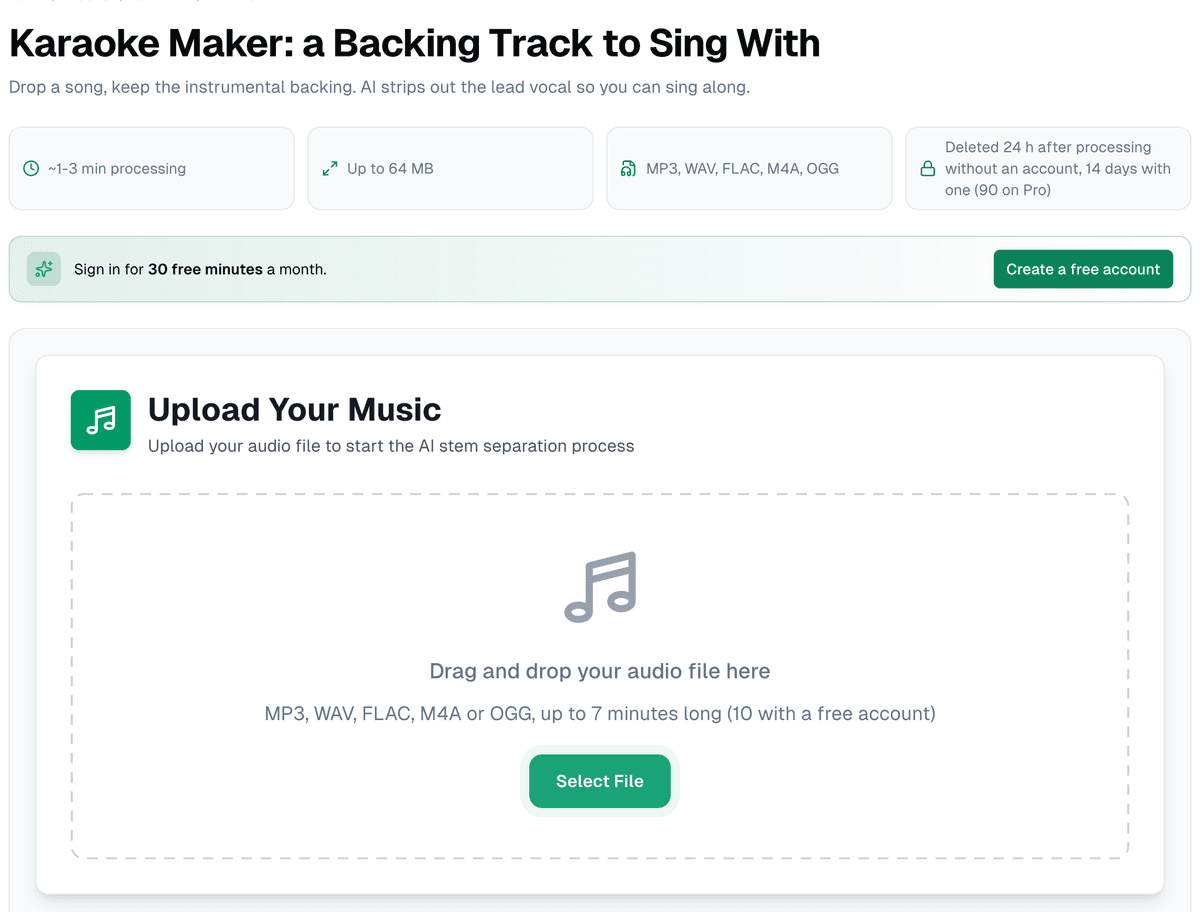
Upload a recording you have the right to use (your band's demo, a song you wrote, a track your teacher gave you) to the karaoke maker. Same formats and limits as the other separation pages: MP3, WAV, FLAC, M4A or OGG, up to 64 MB, up to 7 minutes long without an account (10 with a free one), one to three minutes to process.
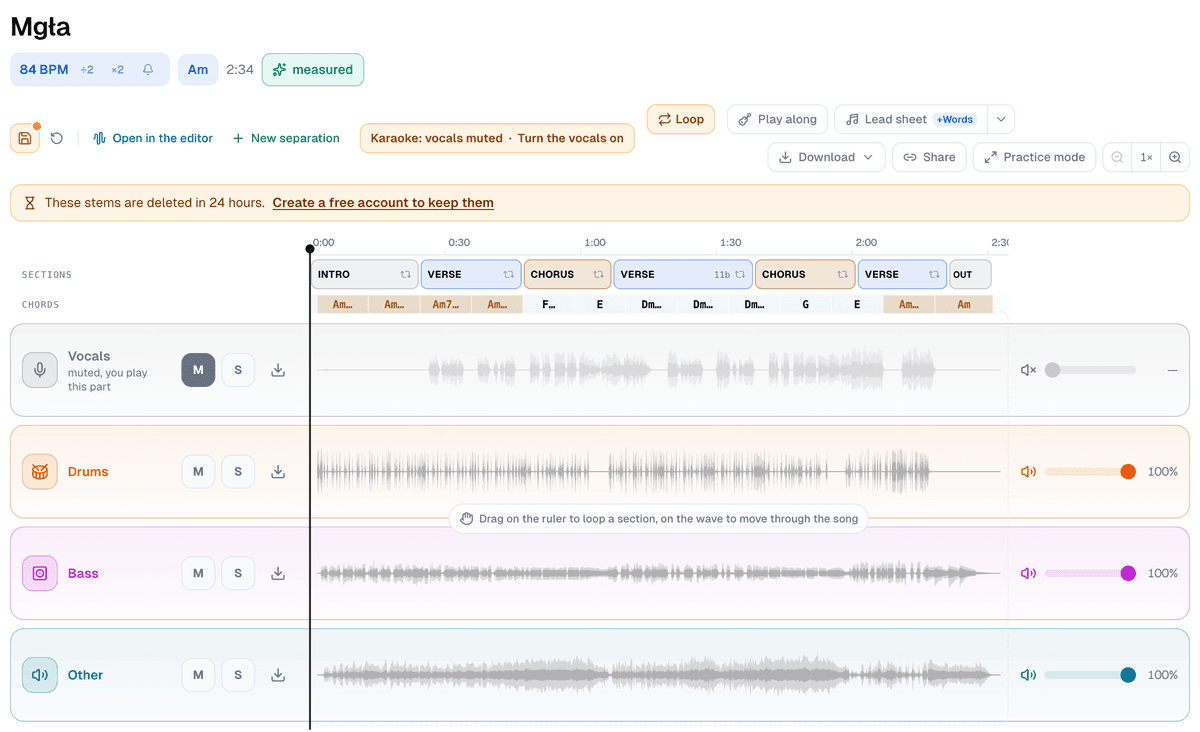
When the separation finishes, the practice screen opens by itself with four lanes and the voice already muted, under a label that reads "Karaoke: vocals muted". It's the same four-stem separation the acapella extractor runs, with the other part muted.
Step 2: turn the original voice down, not off
Press "Find my key" under the key control. It opens a panel under the transport, and its upper half suggests a key for your voice (that part has its own article, finding the right key to sing a song). The row at the bottom is the one this article is about: "Original vocal", with three buttons.
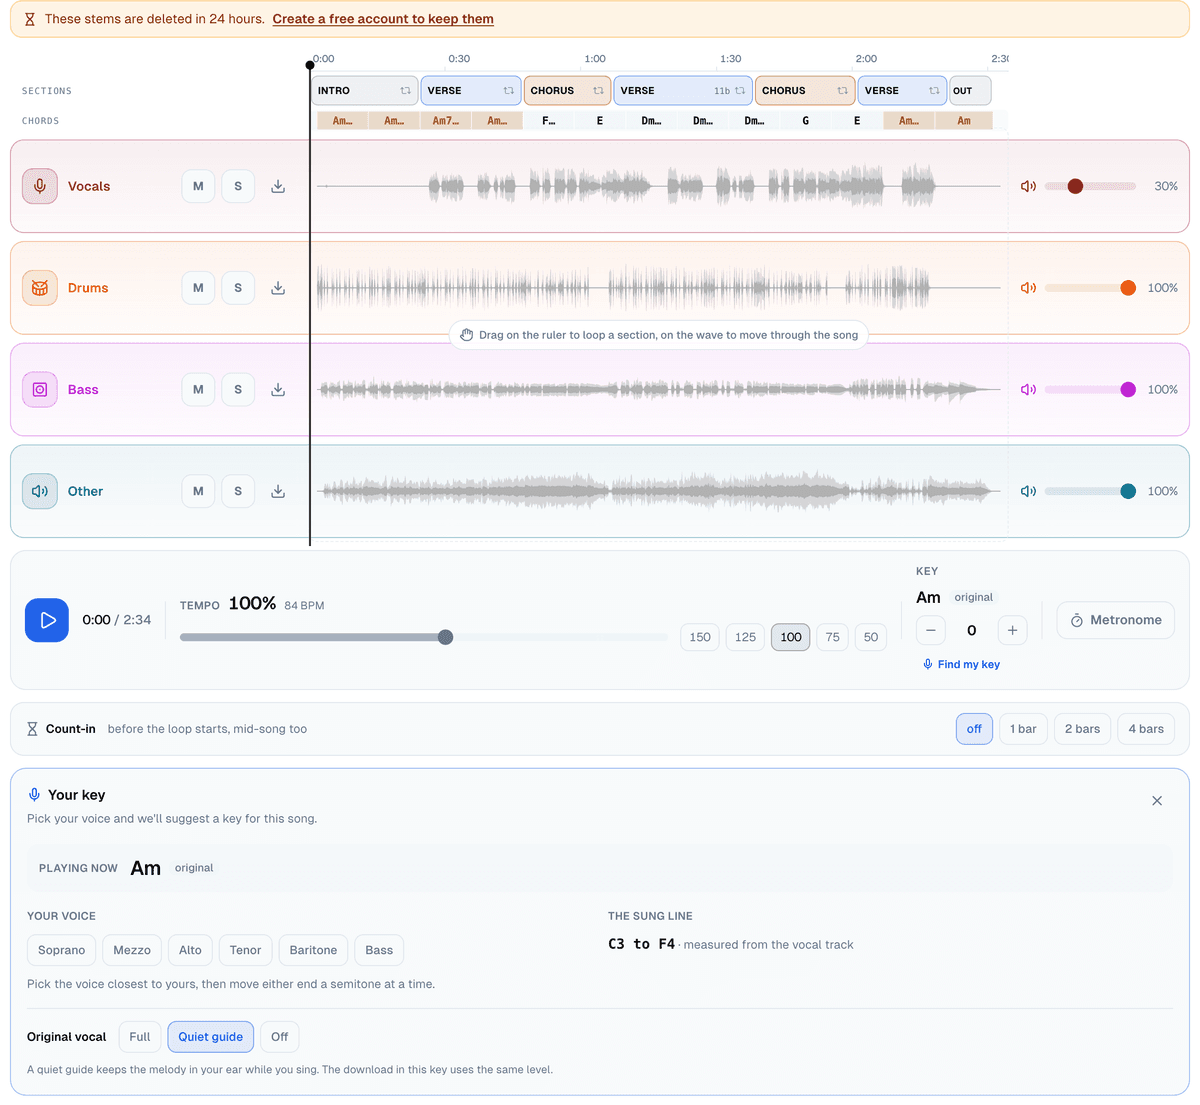
- "Full" plays the singer at the level of the record. Use it while you're still learning where the line goes.
- "Quiet guide" drops the original voice to 30%, under the band rather than over it. You'll still hear the melody when you lose it, but you're doing the singing. As the hint under the buttons puts it, a quiet guide keeps the melody in your ear while you sing.
- "Off" mutes the voice. The backing plays alone, as it will on the night.
Don't rush the middle step. A few days with the quiet guide is where the pitch settles: every time you drift, the guide is there to pull you back, and every time you don't, you can hear that you were right. Move to Off when a whole run-through with the guide feels boring.
Step 3: count yourself in
With a backing track, a late entry goes wrong far more often than a wrong note. The row under the transport is "Count-in", with four choices: off, 1 bar, 2 bars and 4 bars. The count plays before the loop starts, and mid-song too: if the loop you marked doesn't begin on the one, the click comes in over the song before it reaches your phrase. Next to the key control is the metronome, which clicks along with the whole song in the bar the screen detected (4/4 on the button in our example).

One bar is enough for most entries. Use two when the phrase starts after a long instrumental and you need a moment to breathe. Loop just the last two bars of the intro and your entry, and practise that one moment until it's automatic. Loops, tempo and names work exactly as in the previous article.
The band has lanes of its own
Because the backing comes as three stems rather than one, drums, bass and "Other" each keep their own lane, fader and solo button while you sing. That gives you a few tricks a single backing file can't. Solo the bass for a moment and you'll hear the root under a note you keep missing. Turn the drums down when the groove is pushing you too hard. If what you have is a rehearsal of your own band, the stem separation page makes the same four-way split with nothing muted to start with, and you mute the vocal yourself.
Step 4: save the session and leave a note for tomorrow
At the bottom of the screen are three cards: "Saved loops", "Practice note" and "Save session". "Practice note" is a free text field; write what you want to remember next time ("breathe before the chorus", "guide off from Friday"). "Save session" shows what's about to be kept: tempo, key, muted parts and saved loops.
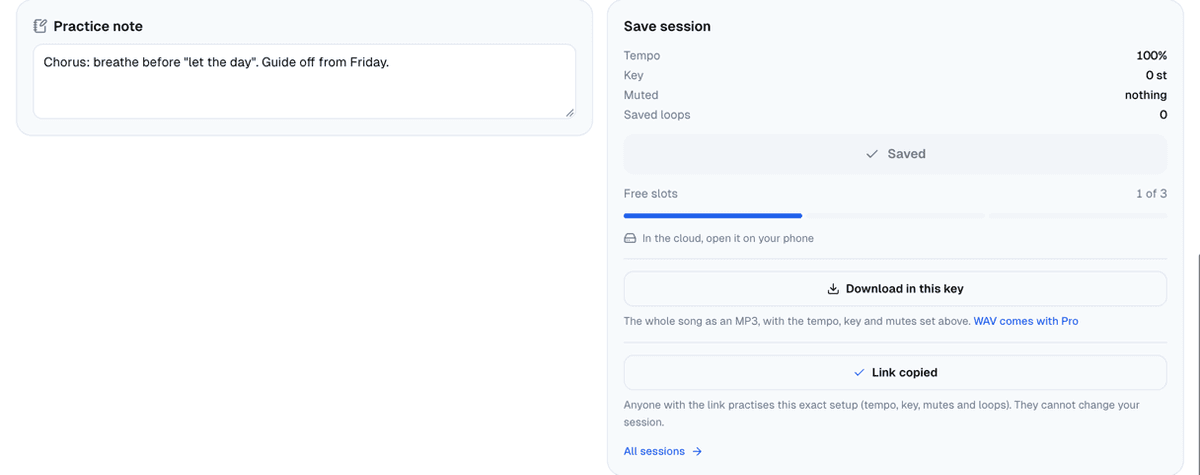
A saved session also remembers the metronome, the count-in and the note. Signed in, it's in the cloud ("In the cloud, open it on your phone"); signed out, it's saved on that device only. A free account keeps three sessions, so three songs in progress at once, and Pro has no limit. The audio itself is kept for 24 hours without an account, 14 days on a free one and 90 on Pro. When the files expire, the session stays: drop the same file on the screen again and your loops land on the same seconds.
One detail worth knowing: a session keeps what's muted but not where the volume sliders sit. "Off" is a mute, so it's saved. "Quiet guide" is a volume setting, so the original voice comes back at full the next time you open the session. It's one click in the "Original vocal" row.
Step 5: send the setup to your teacher or your band
Once a session is saved, "Copy a practice link" appears in the same card. Whoever opens the link practises your exact setup, tempo, key, mutes and loops, and they can't change your session. Your note is at the top of their screen, next to "shared with you", and no account is needed to play it.
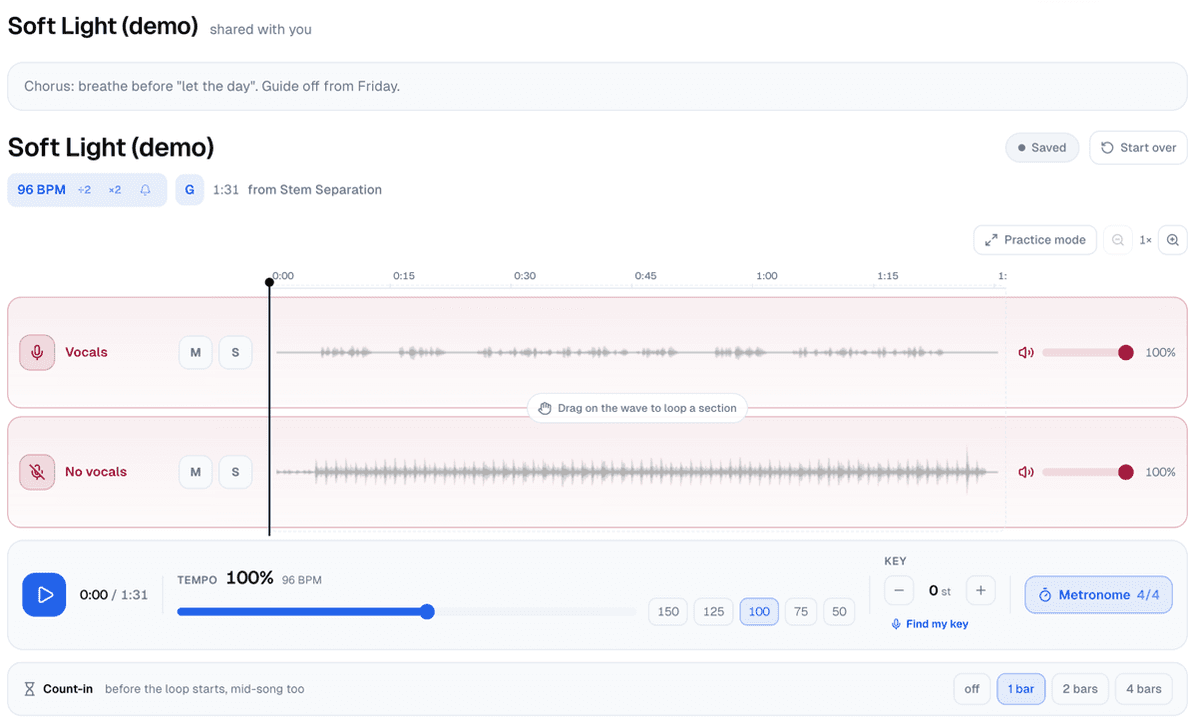
That's the simplest way to prepare for a lesson: your teacher opens the same loop at the same tempo and hears exactly what you've been working on. A band works the same way. The drummer gets a link with the drums muted, the bass player one with the bass muted, and everyone comes to rehearsal having played the same arrangement. Because fader levels aren't part of the link, choose "Off" rather than "Quiet guide" before you share if the person on the other end shouldn't hear the original voice.
Step 6: take the whole song to rehearsal
The last button on the card, "Download in this key", renders the whole song rather than your loop, with the tempo, key and mutes you've set. The level of the original voice goes into the file too, so a quiet guide comes out quiet. You need an account for this, and a free one is enough: you get an MP3 at 192 kbps, and "WAV comes with Pro" for a lossless copy. The file name says what's in it, something like "Soft Light (demo) (0 st, 100%).mp3", so versions at different speeds don't get mixed up in a folder. A long song can run out of memory on a phone, so a computer is the safer place to render it.
A week from the guide to the stage
- Days 1 and 2: "Full". Sing the whole song along with the record, loop what doesn't sit, write a note after each session.
- Days 3 and 4: "Quiet guide". A one-bar count-in, the whole song, then the two hardest loops.
- Day 5: "Off" and the metronome on. If an entry drifts, loop the bar before it with the count-in.
- Day 6: Save the session and send the link to your teacher or the band.
- Day 7: Download the song and sing it through from start to finish, once, without stopping, as if it were the gig.
Everything above comes from one upload. Make the backing track with the karaoke maker, and the practice screen, the session and the link are all a button away.
Cover photo: a vocal microphone on a stand, by Kane Reinholdtsen, public domain (CC0), via Wikimedia Commons, resized. The first practice screen and the quiet guide show Mgła by 3Biegun, one of our own recordings; the song in the other screenshots is a synthetic demo made for these articles.


.jpg)