


Most singers learn a new song the same way: play the recording, sing along, rewind, sing along again. It works until the line you need sits under a wall of guitars, or the singer on the record slides through three notes you can't pick apart at full speed. The acapella extractor fixes the first problem by giving you the voice on its own, and the practice screen behind it fixes the second, with a loop, a tempo control that doesn't change the pitch, and a way to get the tune written down.
One thing before you upload. Use a recording you have the right to work with: your band's rehearsal, a demo from the songwriter, a track your choir director sent round. The upload form asks you to confirm that, and it's not a formality.
Step 1: separate the voice from the band
Drop the file on the acapella extractor. It takes MP3, WAV, FLAC, M4A and OGG, up to 64 MB per upload and up to 7 minutes long without an account (10 with a free one), and a separation takes one to three minutes. The first time you upload, you tick "I have the right to use this recording", and the job starts.
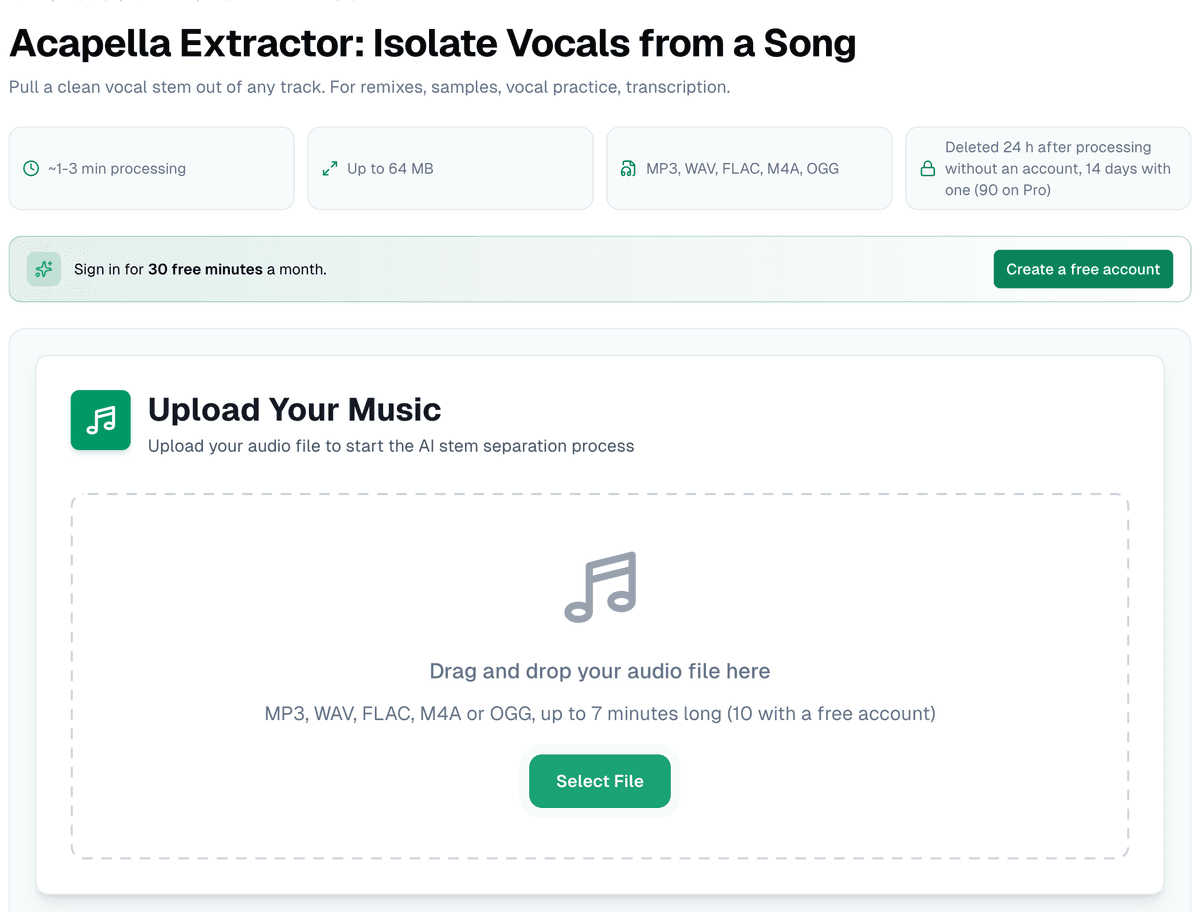
Without an account you get one free separation a day. With one, separations come out of a monthly allowance of minutes, and the page tells you what a file will cost before you start ("Costs 2 min" for a song of a minute and a half). The stems are kept for 24 hours without an account, 14 days on a free one and 90 on Pro, so with an account there's time to come back to them over a couple of weeks of practice.
Step 2: listen to the voice alone
When the separation finishes, the practice screen opens by itself. The song is split into four stems, and because this is the acapella extractor, everything but the voice starts muted: a label at the top reads "Acapella: vocals only", with "Bring the band back" beside it. It all plays in the browser without an account. The stems download as files once you have a free one, and under "Download" the first item is "Vocals only".
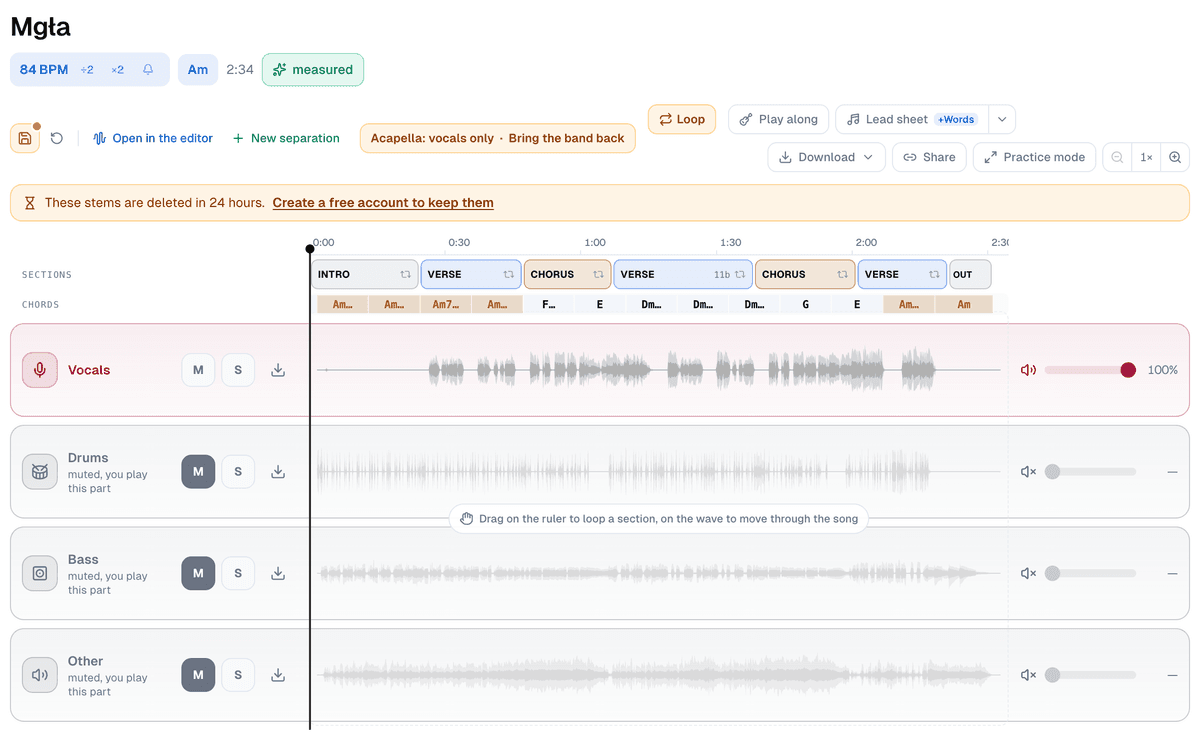
Play the vocal once from start to finish before you touch anything else. On a good separation you'll hear things the full mix hid: where the singer breathes, which words are clipped short, where a note is bent into place rather than hit. That's the part you're about to learn, so it's worth a full listen with nothing on top.
Step 3: find your way around the screen
There are four lanes, "Vocals", "Drums", "Bass" and "Other", each with a mute button (M), a solo button (S), a volume slider, a download button and its own waveform. Under them is the transport: play, the tempo, the key and a metronome, then the count-in.
Under the key control sits "Find my key", which opens a "Your key" panel. It compares the sung line with your voice and suggests how far to move the song. That's a subject of its own, and it's covered in finding the right key to sing a song. For learning the part you can close it and come back to it later.
Step 4: loop one phrase and slow it down
The voice is already on its own: the band's lanes are greyed over with "muted, you play this part". Now mark one phrase, just one, a line or half a line. Drag along the time ruler above the lanes, or put the playhead in the phrase and press "Loop", which loops the section under it. (A drag on the waveform itself only moves through the song.) Two orange handles, A and B, mark the loop, and the loop's range appears above the lanes. Press play and the phrase repeats until you stop it.
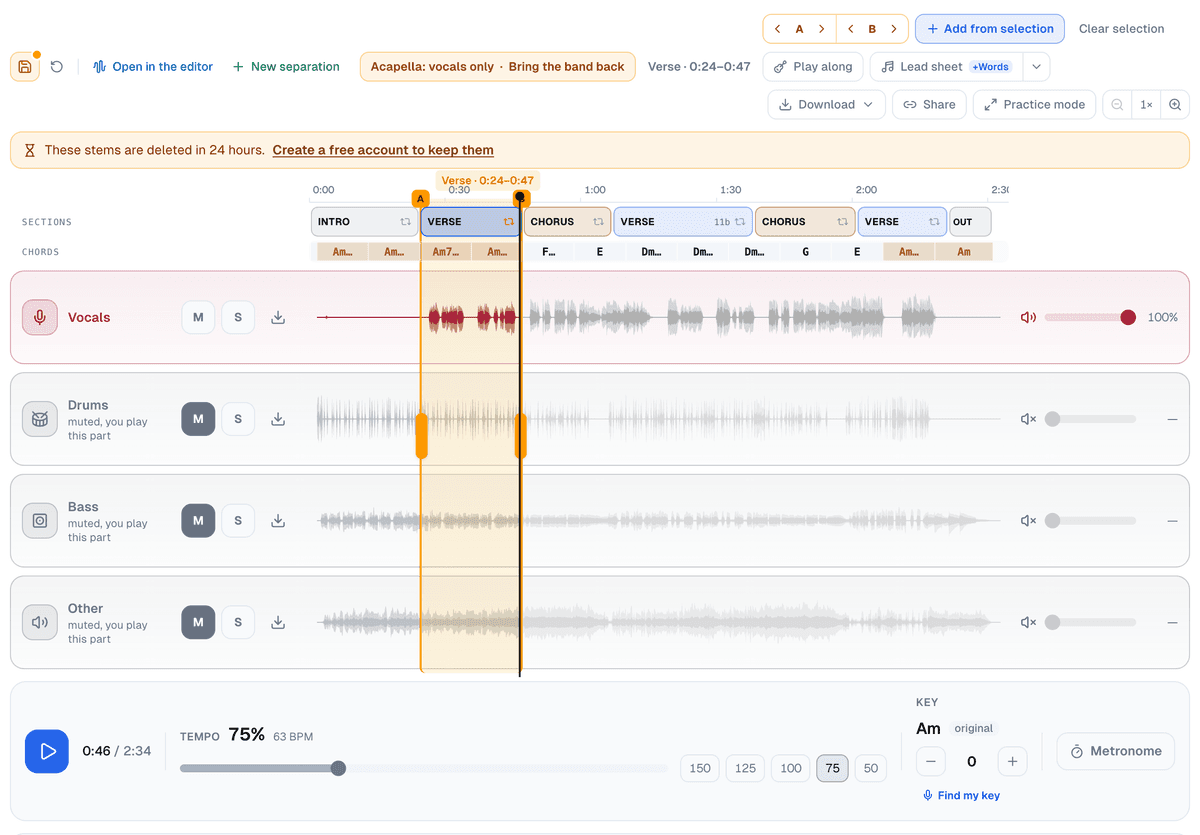
Then bring the tempo down. The slider runs anywhere from 40% to 150%, and the buttons beside it jump straight to 150, 125, 100, 75 or 50. The pitch stays where it was at any speed, so a slowed phrase is still in the key you'll sing it in. A rough guide that works for most singers:
- 75% for the words. At this speed you can hear every consonant and still feel the groove.
- 50% for a run, a fast melisma or an ornament you can't pick apart. Sing it slowly and accurately first, then speed it up.
- 100% as soon as the phrase comes out the same three times in a row. A part learned only at half speed tends to fall apart at full speed.
The keyboard saves a lot of mouse work here. Space plays and stops, L loops the current selection, and the arrow keys nudge the loop's edges when a phrase starts a hair earlier than you marked it.
Step 5: name the phrases you keep coming back to
A song usually has three or four spots that take most of the work: an entry after a long rest, a high note at the end of the chorus, a line with too many words. Once a loop sits right, press "Add from selection" and it goes into "Saved loops". "Name the loop" opens a text field with four suggestions to start from (verse, chorus, solo, that hard bar), or you can type your own.
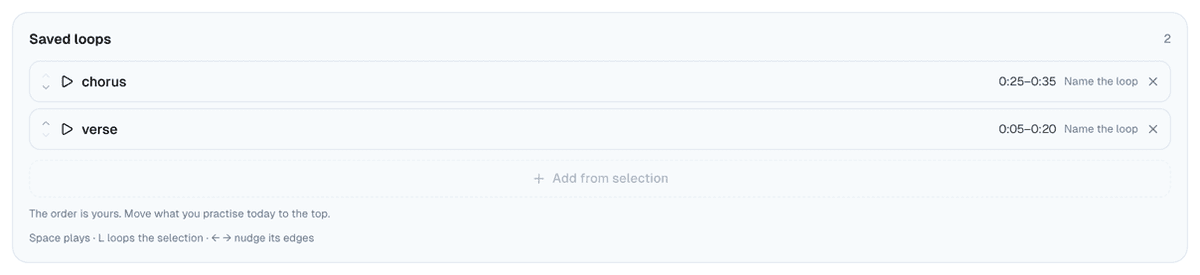
The list is yours to reorder, as the card says: move what you practise today to the top. Click a loop's name and the screen jumps to it and loops it, so ten minutes on three phrases doesn't mean marking the same phrase thirty times.
Step 6: let the server find the sections
You don't have to ask for them. After the separation the server counts the beats and marks the sections and chords in the background, account or not, and two strips appear over the waveform, "Sections" and "Chords". Click a section and the screen loops it for you ("Click to loop it"), bar-accurate, so there's nothing to drag.
A word on the section names. They come from a model reading the audio, not from the songwriter. On our demo song it labelled the choruses "Drop" and the second verse "Break", and it got the bar counts right. Read the names as a map and trust the boundaries more than the labels.
Step 7: switch to practice mode for the repetitions
When the work turns into repetition, press "Practice mode". The screen clears to what you'd read from a music stand: the tempo in large figures, the beats of the bar, the current and next chord once the server has counted them, the loop's waveform, and three buttons (back to the start of the loop, play, next loop). It goes full screen where the browser allows it and keeps the screen awake while it's open.
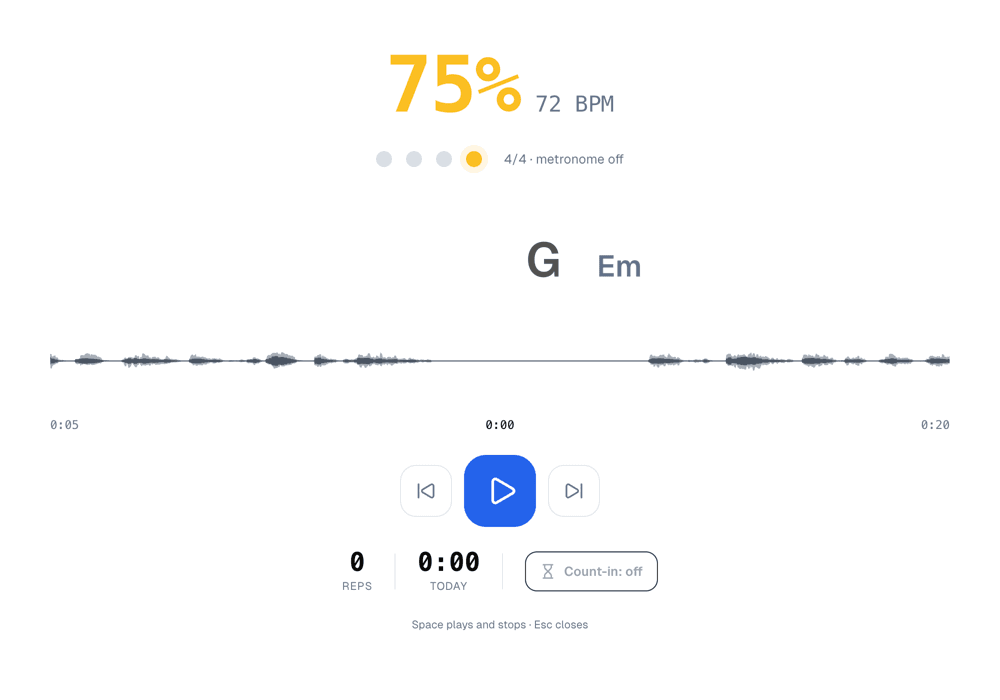
Under the buttons are two counters, reps and time played today. They're the honest answer to "did I actually practise tonight". The keys are simple: Space plays and stops, Esc closes.
Step 8: get the tune written down
Some singers learn by ear alone, and plenty want the melody on paper too, for a choir folder or a lesson. Once the server has counted the beats, which it does by itself after the separation, a signed-in practice screen shows a "Read the tune" button above the lanes. It works from the separated voice, which a pitch tracker hears far more clearly than a voice inside a mix. When it's done, the button becomes "Lead sheet with the tune", and that opens the Lead Sheet Maker with the chords in bars and the melody on a staff.
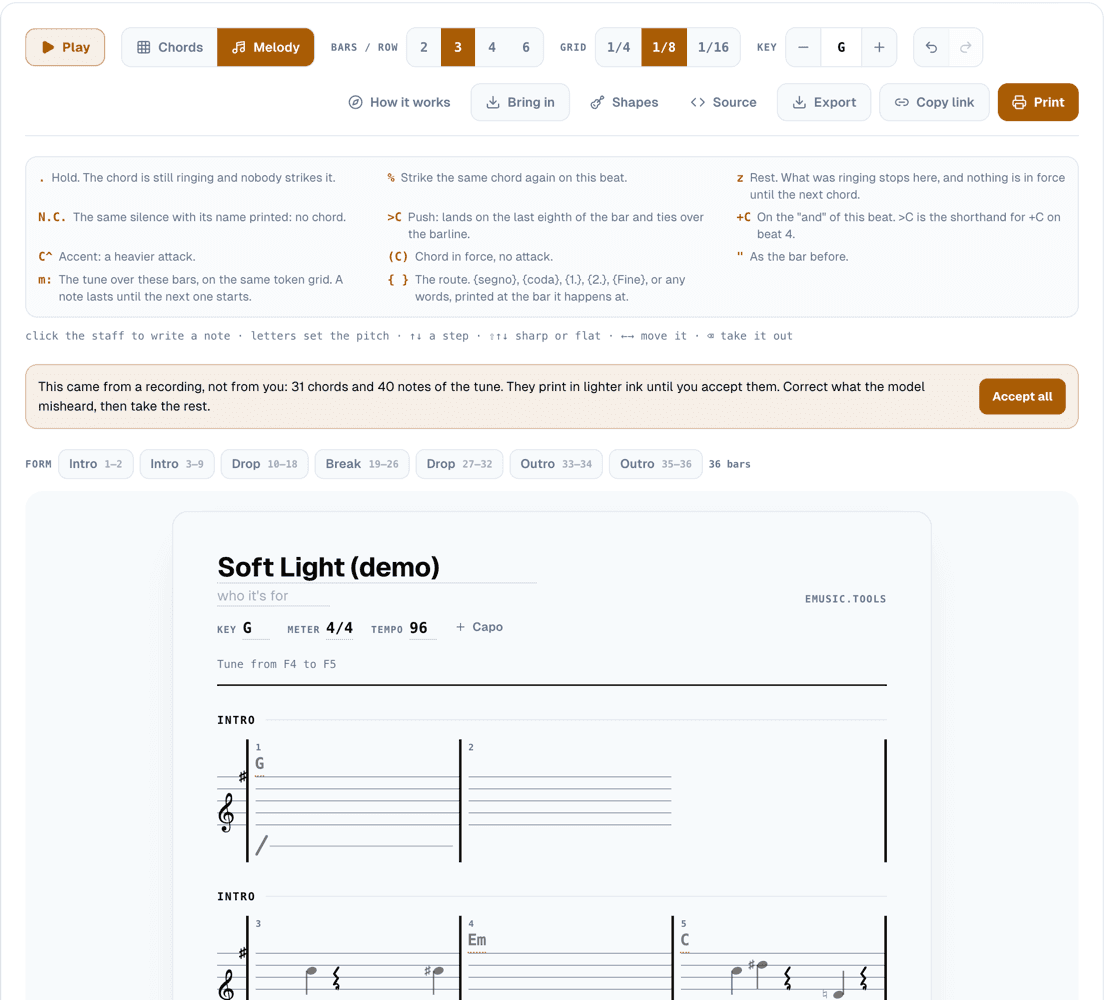
Read the notice at the top before you print anything: "This came from a recording, not from you". Everything the model wrote prints in lighter ink until you accept it, and you're expected to fix what it misheard. On our demo it put a few sharps where the singer was simply a little flat. Play the loop, compare it with the staff, correct those notes, then accept the rest. If you've moved the song to another key, the button says so ("Lead sheet with the tune, in ...") and the chart arrives in that key rather than the recording's.
A week with one song
Put together, learning a part looks something like this:
- Day 1: Separate the recording, listen to the vocal alone from start to finish, mark the three hardest phrases and name them.
- Days 2 and 3: Solo the vocal and loop each named phrase at 75%, singing along with it, until the words sit.
- Day 4: The fast bits at 50%, then 75%, then 100%. Practice mode, counting reps.
- Day 5: Write the tune down with "Read the tune", correct it against the recording and print it.
- Day 6 onwards: Unmute the backing and start singing over the band. The next article, how to practise singing with a backing track, picks up from there: the original vocal as a quiet guide, then gone, a count-in for the entries, and a session to take to rehearsal.
All of it runs on one upload, with no second file and no other program to install. Start with the acapella extractor, and the practice screen opens by itself once the separation is done.
Cover photo: a choir folder open on a music stand, by David Beale, public domain (CC0), via Wikimedia Commons, resized. The practice screen right after the separation and the loop show Mgła by 3Biegun, one of our own recordings; the song in the other screenshots is a synthetic demo made for this article.


.jpg)